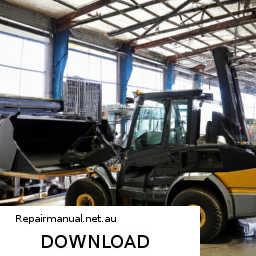
Replacing a catalytic converter on a Volvo MC110B Skid Steer Loader can seem like a daunting task, especially if you have little mechanical experience. click here for more details on the download manual…..
2013 Volvo MC135C Skid Steer For Sale Skid steer for sale/used skid steer http://www.texasskidsteer.com #0022.
However, with the right tools and a step-by-step approach, you can accomplish it. Below is a simplified guide to help you through the process.
### Tools and Materials Needed:
1. **Tools:**
– Wrench set (including socket wrenches)
– Ratchet
– Screwdriver
– Pliers
– Torque wrench (optional but recommended)
– Safety goggles
– Work gloves
2. **Materials:**
– New catalytic converter
– Exhaust gaskets (if required)
– High-temperature exhaust sealant (optional)
### Step-by-Step Instructions:
#### 1. **Safety First**
– **Turn Off the Engine:** Ensure the skid steer loader is turned off and cool to avoid burns.
– **Disconnect the Battery:** Disconnect the negative terminal of the battery to prevent any electrical issues.
#### 2. **Locate the Catalytic Converter**
– The catalytic converter is usually located in the exhaust system, between the engine and the muffler. Look for a cylindrical or oval-shaped part connected to the exhaust pipe.
#### 3. **Prepare the Area**
– Make sure you have enough space to work around the engine and exhaust system. Clear any debris or obstacles that might hinder your movement.
#### 4. **Remove the Old Catalytic Converter**
– **Loosen the Bolts:** Using the appropriate wrench, carefully loosen the bolts that hold the catalytic converter in place. Depending on the design, there may be clamps as well.
– **Disconnect Any Sensors:** If there are any oxygen sensors attached to the catalytic converter, carefully unplug them using your pliers if needed.
– **Remove the Converter:** Once all bolts and clamps are removed, gently pull the catalytic converter out of the exhaust system. It may take a bit of wiggling to free it.
#### 5. **Install the New Catalytic Converter**
– **Align the New Converter:** Place the new catalytic converter in the same position as the old one. Make sure it fits snugly into the exhaust system.
– **Reconnect Any Sensors:** If you unplugged any oxygen sensors, reconnect them now.
– **Secure the Converter:** Tighten the bolts or clamps to secure the new catalytic converter in place. Ensure it is snug but be careful not to overtighten, which can damage the converter or exhaust pipes.
#### 6. **Check for Leaks**
– If you used any exhaust sealant, allow it to cure according to the manufacturer’s instructions.
– Before starting the engine, double-check that everything is securely connected.
#### 7. **Reconnect the Battery**
– Reconnect the negative terminal of the battery.
#### 8. **Start the Engine**
– Start the engine and let it run for a few minutes. Check around the new catalytic converter for any signs of exhaust leaks (hissing sounds or visible smoke).
#### 9. **Final Check**
– take the skid steer for a short test drive to ensure everything is functioning properly. Listen for any unusual noises and check for leaks once more.
### Conclusion
Replacing a catalytic converter can be a manageable task with a bit of patience and attention to detail. If at any point you feel unsure, don’t hesitate to consult a professional mechanic. Regular maintenance of your skid steer loader is essential for its longevity and performance.
A relay is an electromechanical switch used in various automotive applications to control the flow of electricity in a circuit. Its primary function is to allow a low-power signal to control a higher-power circuit, making it an essential component in modern vehicles. The relay consists of an electromagnet, an armature (a movable lever), and contacts that open or close the circuit. When an electric current flows through the coil of the relay, it generates a magnetic field that attracts the armature, causing it to move and either connect or disconnect the contacts.
Relays are used in numerous automotive systems, including lighting controls, power windows, fuel pumps, and heating systems. For example, when you turn on your headlights, the switch sends a small current to the relay, which then activates a larger current to power the headlights. This design not only allows for the efficient management of electrical loads but also protects the vehicle’s electrical components from damage due to excessive current.
Relays come in various configurations, including single-pole, double-pole, normally open, and normally closed, allowing them to be tailored to specific applications. Their robustness and reliability make them vital for ensuring that electrical systems in vehicles operate seamlessly. In summary, relays play a crucial role in the safety and functionality of automotive electrical systems, enabling complex operations while safeguarding against electrical failures.