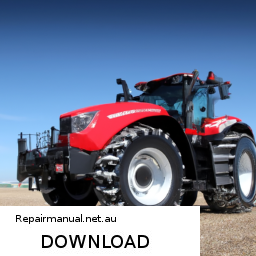
Replacing the anti-roll bar (also known as a sway bar) on a Case IH F50 or F54 tractor involves several steps and requires specific tools. click here for more details on the download manual…..
- SONIC BOOM!!! Breaking the sound barrier!!
- Motorola Edge 50 Fusion Water Resistant Testing #MotorolaEDGE50Fusion #Motorola #waterproofmobi… Motorola Edge 50 Fusion Water Resistant Testing #MotorolaEDGE50Fusion #Motorola #waterproofmobile.
Here’s a detailed guide to help you through the process:
– **Safety First**
– Ensure the tractor is parked on a level surface.
– Turn off the engine and remove the key to prevent accidental starting.
– Engage the parking brake to prevent movement.
– Use wheel chocks to secure the tractor.
– **Gather Necessary Tools and Materials**
– **Wrenches and Sockets**: A complete set of metric and standard wrenches and sockets, typically 10mm to 19mm.
– **Ratchet and Extension**: For better reach in tight spaces.
– **Torque Wrench**: To ensure all bolts are tightened to the manufacturer’s specifications.
– **Pry Bar**: Useful for moving parts that may be stuck.
– **Jack and Jack Stands**: To lift the tractor safely for better access to the anti-roll bar.
– **Safety Gloves and Goggles**: To protect yourself during the process.
– **Replacement Anti-roll Bar**: Ensure you have the correct part for your model.
– **Lubricant**: Such as WD-40 or grease to help remove old parts and lubricate new ones.
– **Lift the Tractor**
– Position the jack under the frame or designated lifting points.
– Lift the tractor until it is high enough to comfortably work underneath.
– Secure it with jack stands to ensure stability.
– **Remove the Old Anti-roll Bar**
– Locate the anti-roll bar, which typically runs between the left and right suspension arms.
– Inspect the mounting points for bolts or bushings.
– Use the appropriate socket or wrench to remove the bolts securing the anti-roll bar to the suspension arms and the chassis.
– If the bolts are rusted or difficult to remove, apply penetrating oil and allow it to soak for a few minutes.
– Carefully remove the anti-roll bar from its mounting points. You may need to maneuver it slightly or use a pry bar to help free it.
– **Inspect Components**
– Check the condition of the bushings and mounting points. If they are worn or damaged, it’s advisable to replace them along with the anti-roll bar.
– Inspect the chassis and suspension arms for any signs of wear or damage.
– **Install the New Anti-roll Bar**
– Position the new anti-roll bar in place, aligning it with the mounting points.
– Insert the bolts through the bushings and into the mounting points.
– Hand-tighten the bolts first to ensure everything is aligned correctly.
– **Torque the Bolts**
– Once all bolts are in place and hand-tightened, use a torque wrench to tighten them to the manufacturer’s specifications. This information is typically found in the service manual or on a specification label.
– Follow a crisscross pattern when tightening to ensure even pressure.
– **Recheck and Lubricate**
– After installation, recheck all bolts to ensure they are tight.
– Apply lubricant to any moving parts or bushings to prevent squeaking and wear.
– **Lower the Tractor**
– Carefully remove the jack stands and lower the tractor back to the ground.
– Ensure everything is secure and functioning properly before starting the engine.
– **Final Inspection**
– Once the tractor is back on the ground, inspect the anti-roll bar from underneath to ensure there are no loose parts or misalignments.
– Test the tractor by driving it slowly and checking for any unusual noises or handling issues.
By following these steps carefully, you can successfully replace the anti-roll bar on a Case IH F50 or F54 tractor. Always refer to the tractor’s service manual for specific instructions and torque specifications.
The Positive Crankcase Ventilation (PCV) valve is an essential component in an internal combustion engine’s emissions control system. Its primary function is to regulate the flow of gases that are expelled from the crankcase, which is the part of the engine that houses the crankshaft and is lubricated with engine oil. During the combustion process, small amounts of fuel and air can escape past the piston rings into the crankcase, leading to the formation of blow-by gases. These gases can contain harmful pollutants, including unburned hydrocarbons, which, if not properly managed, can contribute to engine wear and increase emissions.
The PCV valve serves as a one-way valve that allows these gases to be redirected back into the intake manifold, where they can be re-burned in the combustion process, thereby reducing overall emissions and improving engine efficiency. By maintaining a slight vacuum in the crankcase, the PCV system also helps to prevent oil leaks and reduces the buildup of harmful sludge, which can impair engine performance.
A malfunctioning PCV valve can lead to various issues, including increased oil consumption, engine performance problems, and elevated emissions levels. Therefore, regular maintenance and inspection of the PCV valve is crucial for ensuring optimal engine operation and compliance with environmental regulations. Overall, the PCV valve plays a vital role in enhancing engine longevity, efficiency, and environmental sustainability.