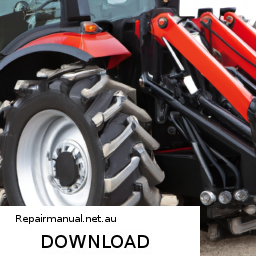
Repairing the exhaust system on a Case 450 Series dozer involves several steps and may require specific tools and materials. click here for more details on the download manual…..
- Case 450C Dozer Operation And Controls When I was searching for a replacement dozer for my farm, I wanted a CASE but what size? Looking at all the videos I found only …
- BARBER CUTS OFF LICE!!!! MUST WATCH
Below is a detailed guide to assist you through the repair process. Please note that safety should always be your top priority when working on heavy machinery. Wear appropriate personal protective equipment (PPE) such as gloves, goggles, and steel-toed boots.
### Tools and Materials Required
1. **Tools:**
– Wrench set (including socket and ratchet)
– Screwdrivers (flathead and Phillips)
– Pliers
– Torque wrench
– Hammer (rubber or dead blow)
– Cutting tool (if needed for cutting pipes or exhaust components)
– Grinder (if needed for smoothing edges)
– Drill with bits (if drilling new holes for mounting)
– Wire brush or cleaning tool
2. **Materials:**
– replacement exhaust components (such as pipes, muffler, gaskets, clamps)
– Exhaust sealant (high-temperature silicone or similar)
– Anti-seize compound (for bolt threads)
– Safety equipment (fire extinguisher, first aid kit)
### Steps for Exhaust Repair
#### 1. **Safety Preparations**
– Ensure the dozer is on a level surface.
– park the machine, set the parking brake, and turn off the engine.
– Allow the engine to cool before starting work.
– Disconnect the battery to prevent any electrical issues.
#### 2. **Inspection**
– Visually inspect the entire exhaust system for signs of damage, such as cracks, rust, or holes. Pay particular attention to:
– Exhaust manifold
– Exhaust pipes
– Muffler
– Tailpipe
– Gaskets and clamps
– If you find any damaged components, make a note of what needs replacing.
#### 3. **Removing Damaged Components**
– Use a wrench or socket set to remove the bolts and nuts securing the exhaust manifold to the engine. Be careful not to strip the bolts.
– If the manifold is rusted, you might need to use penetrating oil to loosen the bolts.
– Carefully detach the exhaust pipes connected to the manifold and muffler. You may need to cut pipes if they are severely rusted.
– Remove the muffler and tailpipe, ensuring to keep track of any mounting brackets or clamps.
#### 4. **Preparing for Installation**
– Clean all mating surfaces (where components connect) using a wire brush or grinder to remove rust and debris.
– Inspect and replace gaskets between the manifold and pipe, and between the muffler and tailpipe if needed.
– If any bolts or nuts are damaged, replace them with new ones.
#### 5. **Installing New Components**
– Start by installing the new exhaust manifold, making sure to use an anti-seize compound on the threads of the bolts. Torque them to the manufacturer’s specifications.
– Attach the new exhaust pipes, ensuring proper alignment with the manifold and muffler.
– Install the muffler next, ensuring it is securely mounted using any necessary brackets and clamps.
– Attach the tailpipe to the muffler, ensuring that it extends out to the rear of the machine.
#### 6. **Sealing and Securing**
– Apply exhaust sealant to any joints that require it to ensure a leak-proof seal.
– Tighten all clamps and connections securely.
– Make sure to torque all bolts to the manufacturer’s specifications.
#### 7. **Final Checks**
– Reconnect the battery.
– Start the dozer and let it run for a few minutes. Check for any exhaust leaks around the joints and connections.
– Listen for any unusual noises which may indicate improper installation or alignment.
– Inspect all components once again to ensure everything is secure and properly installed.
#### 8. **Cleaning Up**
– Dispose of any old components and materials according to local regulations.
– Clean up your work area and ensure all tools are accounted for.
### Conclusion
Repairing the exhaust system on a Case 450 Series dozer requires careful attention to detail and proper techniques to ensure a successful repair. If you are not confident in your ability to complete the repair safely, it may be best to consult with a qualified mechanic. Always refer to the specific service manual for your Case 450 for precise torque specifications, part numbers, and additional guidance tailored to your machine.
The power steering pump is a crucial component in a vehicle’s steering system, designed to assist the driver in steering the vehicle with minimal effort. It is part of the hydraulic power steering system, which uses hydraulic fluid to amplify the force exerted by the driver on the steering wheel. The primary function of the power steering pump is to create pressurized hydraulic fluid, which is directed to the steering gear or rack, enabling smoother and more responsive steering.
Typically driven by the engine via a belt, the power steering pump consists of a housing, an impeller or rotor, and a reservoir for hydraulic fluid. When the driver turns the steering wheel, the pump generates pressure in the hydraulic fluid, which flows through hoses to the steering mechanism. This pressure helps move the steering gear, reducing the physical effort needed to turn the wheel.
There are two main types of power steering pumps: belt-driven pumps and electric pumps. Belt-driven pumps are the traditional type, while electric pumps are becoming more common in newer vehicles, offering advantages such as improved fuel efficiency and the ability to adjust the level of assistance based on driving conditions.
Over time, power steering pumps can experience wear and tear, leading to issues like noise, fluid leaks, or reduced steering assistance. Regular maintenance, including checking and replacing the hydraulic fluid, is essential for ensuring the pump’s optimal performance and longevity. In summary, the power steering pump is vital for enhancing the driving experience, making steering more manageable and comfortable.