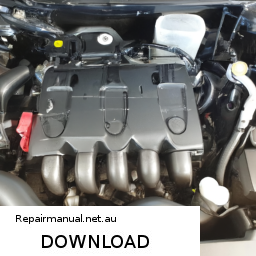
Sure! click here for more details on the download manual…..
- How to test a Variable Valve Timing (VVT) Solenoid Shorts This video shows you how we test an Oil Control Valve (OCV) which is also called VVT control Valve Disclaimer: Any …
- engine overhaul|| engine head reface ||head gasket replacement ||engine overheat||#shorts #reels. honda #suzuki #toyota #reels #rebuild #repair #engine #overhaul #overheat #audi.
Repairing the suspension spring seat on a KIA Soul can be a bit of a project, but I’ll break it down into simple steps. This guide assumes you have little mechanical experience, so I’ll keep it straightforward.
### What You’ll Need:
– Basic hand tools (wrenches, sockets, ratchet)
– Jack and jack stands (to lift the car safely)
– Tire iron (to remove the wheels)
– Replacement spring seat (if necessary)
– Safety goggles and gloves
### Step-by-Step Guide:
#### 1. **Safety First**
– **Wear Safety Gear:** Put on your safety goggles and gloves.
– **Work on a flat Surface:** Make sure you are parked on a flat, stable area.
#### 2. **Lift the Vehicle**
– **Loosen the Lug Nuts:** Before lifting the car, use the tire iron to slightly loosen the lug nuts on the wheel where you’ll be working. Don’t remove them completely yet.
– **Jack Up the Car:** Use the jack to lift the car from the designated lift points (check your owner’s manual for locations).
– **Secure with Jack Stands:** Once the car is lifted, place jack stands under the vehicle for safety. Never work under a car that’s only supported by a jack.
#### 3. **Remove the Wheel**
– **Take Off the Wheel:** Now you can remove the lug nuts completely and take off the wheel. Set it aside in a safe place.
#### 4. **Access the Suspension**
– **Locate the Spring Seat:** The suspension spring seat is typically located at the top of the strut assembly near where the spring is attached. You’ll see a large coil spring.
– **Inspect for Damage:** Check the spring seat for any cracks or damage. You might need to replace it if it looks worn out.
#### 5. **Remove the Strut Assembly**
– **Disconnect Components:** Depending on your model, you may need to disconnect other parts like the brake line or sway bar link connected to the strut assembly.
– **Unbolt the Strut:** There will be bolts holding the strut to the hub assembly and possibly at the top under the hood. Use your socket set to remove these bolts carefully.
#### 6. **Compress the Spring (if necessary)**
– **Spring compressor Tool:** If you need to replace the spring seat, you’ll have to remove the spring from the strut. Use a spring compressor tool to safely compress the spring. This tool is designed to hold the spring tightly so it doesn’t uncoil and cause injury.
– **Remove the Spring:** Once compressed, you can remove the top nut holding the spring in place and carefully take off the spring.
#### 7. **Replace the Spring Seat**
– **Install New Spring Seat:** If you have a new spring seat, place it where the old one was located.
– **Reassemble the Spring and Strut:** Reinstall the spring onto the strut. Make sure everything is aligned properly.
#### 8. **Reinstall the Strut Assembly**
– **Attach the Strut:** Bolt the strut assembly back to the hub and secure it at the top under the hood.
#### 9. **Put the Wheel Back On**
– **Reattach the Wheel:** Place the wheel back onto the hub and hand-tighten the lug nuts.
– **Lower the Car:** Carefully lower the car back to the ground and then tighten the lug nuts in a criss-cross pattern to ensure they are evenly tightened.
#### 10. **Test Your Work**
– **Check for Issues:** Before driving, check that everything is secure and there are no loose parts. It’s also a good idea to take a short test drive to ensure that the suspension feels right.
### Final Thoughts
Repairing the suspension spring seat can be a manageable task with the right tools and safety precautions. If at any point you feel unsure, it’s always best to consult a professional mechanic. Safety should always be your top priority. Good luck!
A piston is a crucial component in internal combustion engines, serving as a vital part of the engine’s mechanism to convert fuel energy into mechanical energy. Typically made of aluminum or an aluminum alloy for optimal strength and lightweight characteristics, the piston operates within a cylindrical chamber called the cylinder. It is designed to move up and down in the cylinder, driven by the combustion of fuel-air mixtures ignited by a spark plug.
The primary function of the piston is to compress the fuel-air mixture before combustion and to transfer the force generated from the combustion process to the crankshaft, ultimately powering the vehicle. The piston is equipped with piston rings, which are essential for creating a seal between the piston and the cylinder wall. This seal prevents the escape of combustion gases and helps maintain the necessary compression within the cylinder.
Pistons are subject to extreme conditions, including high temperatures and pressures, making their design and material choice critical for performance and longevity. Over time, pistons can wear down due to friction, heat, and the corrosive nature of combustion gases, leading to issues such as reduced engine efficiency or complete engine failure. Therefore, understanding the role and maintenance of pistons is vital for anyone involved in automotive engineering or vehicle maintenance.