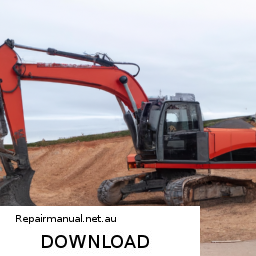
Replacing a CV (Constant Velocity) joint on a Hitachi Zaxis ZX 75US or ZX 75UR excavator involves several steps. click here for more details on the download manual…..
- EX60 EX75 final drive. WhatsApp/WeChat:+8618145752848
- Hitachi Excavator Hydraulic Swing Moter Restoration & Repaire Very Hard Working Hitachi #Excavator #Hydraulic #Swing #Moter #Restoration & #Repaire Very Hord #Working.
Here’s a reverse-order outline of the process:
### 10. Reassemble Components
– **Reattach the Wheel or Track**: If applicable, reattach the wheel or track assembly you removed earlier.
– **Reconnect Any Removed Parts**: Reinstall any components that were taken off to access the CV joint, ensuring all bolts and fasteners are torqued to specification.
### 9. Test the Joint
– **Check for proper Movement**: Before finalizing the assembly, test the movement of the new CV joint to ensure it operates correctly without binding or excessive play.
– **Inspect for Leaks**: Ensure that there are no oil or grease leaks from the newly installed joint.
### 8. Install the New CV Joint
– **Position the New Joint**: Carefully align and install the new CV joint into its housing.
– **Secure with Fasteners**: Tighten the bolts or fasteners to the manufacturer’s torque specifications to secure the joint in place.
### 7. Clean the Area
– **Remove Debris**: Clean the area around the CV joint to prevent contamination during the installation of the new joint.
– **Inspect for Damage**: Check the surrounding components for any signs of wear or damage that may need attention.
### 6. Disconnect drive Shaft
– **Remove drive Shaft**: If the drive shaft is connected to the CV joint, disconnect it by removing the appropriate fasteners.
– **Support the drive Shaft**: Use a suitable support to hold the drive shaft in place while you work on the CV joint.
### 5. Remove Old CV Joint
– **Unfasten the Joint**: Remove the bolts or fasteners securing the old CV joint to the axle or drive shaft.
– **Take Out the Joint**: Carefully extract the old CV joint from its housing.
### 4. Prepare for Replacement
– **Lift the Excavator**: Use appropriate lifting equipment to raise the excavator safely.
– **Ensure Stability**: Make sure the excavator is stable and secure before beginning work.
### 3. Gather Necessary Tools and Parts
– **Collect Tools**: Ensure you have all necessary tools, including wrenches, sockets, and a CV joint puller.
– **Obtain Replacement Parts**: Have the new CV joint and any other required components ready for installation.
### 2. Refer to Service Manual
– **Consult the Manual**: Before starting, review the service manual for specific instructions, torque specifications, and safety precautions related to your model.
### 1. Safety Precautions
– **Wear Protective Gear**: Always wear appropriate safety gear, including gloves and goggles.
– **Ensure Power is Off**: Before performing any maintenance, ensure the excavator is turned off and all hydraulic pressure is released.
This reverse-order list provides a structured approach to replacing the CV joint on a Hitachi Zaxis ZX 75US or ZX 75UR excavator. Always refer to the manufacturer’s guidelines for specific details related to your equipment.
A cable release is a mechanical device commonly used in various applications within the automotive and photography sectors, among others. In the context of automobiles, a cable release typically refers to a system that allows for the remote activation of certain components, most notably the hood latch or trunk latch. This system generally comprises a flexible cable that connects a lever or handle inside the vehicle to the latch mechanism outside.
When the driver pulls on the lever or handle, it pulls the cable, which in turn disengages the latch mechanism. This enables the hood or trunk to open without the need for direct access to the latch itself, providing convenience and ease of use. The cable release mechanism is particularly useful in situations where the latch is located in hard-to-reach areas or when quick access is necessary.
In addition to its practical applications in vehicles, the cable release is also integral to photography, where it serves as a tool for triggering the shutter of a camera remotely. This helps to minimize camera shake during long exposure shots, ensuring greater stability and clarity in images.
Overall, the cable release is a simple yet effective component that enhances functionality and convenience in both automotive and photographic applications, showcasing the versatility of cable systems in various fields.