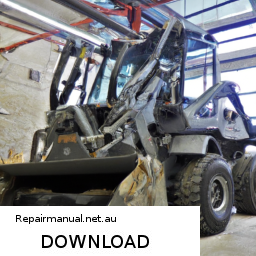
Performing a valve body replacement on a Bobcat 428 requires a thorough understanding of hydraulic systems, as well as mechanical aptitude. click here for more details on the download manual…..
- CAT424B Final Drive Fitment । Axle Repair #automobile #catterpillar #repairing @mechanicno.1 CAT424B Final Drive Fitment । Axle Repair #automobile #catterpillar #repairing @mechanicno.1 cat424 final drive fitment, …
Below are detailed steps and descriptions of tools needed for the job:
– **Safety Gear**
– **Safety Glasses**: Protect eyes from debris and hydraulic fluid.
– **Work Gloves**: Provide grip and protection from sharp edges.
– **Steel-Toed Boots**: Protect feet during heavy lifting.
– **Tools Required**
– **Socket Set**: A complete set of metric and standard sockets, including a ratchet and extension bars, for removing bolts on the valve body.
– **Torque Wrench**: Ensures that bolts are tightened to the manufacturer’s specifications, preventing leaks or damage.
– **Pliers**: For gripping and pulling hoses or clips that may be difficult to reach.
– **Screwdrivers**: Phillips and flathead screwdrivers for removing various screws.
– **Pry Bar**: Useful for gently prying components apart without causing damage.
– **Hydraulic Fluid**: Recommended fluid for the Bobcat 428’s hydraulic system, essential for refilling after the replacement.
– **Drain Pan**: To catch any leaking hydraulic fluid during the removal process.
– **Shop Manual**: A service manual specific to the Bobcat 428 for torque specifications and diagrams.
– **Preparation Steps**
– **Disconnect Battery**: To prevent any electrical short circuits while working on the hydraulic system.
– **Park on Level Surface**: Ensure the Bobcat is on stable ground to avoid movement during repairs.
– **Lift the Machine**: Use a hydraulic Jack to raise the machine, if necessary, and secure with Jack stands for safety.
– **Draining Hydraulic Fluid**
– Position the drain pan under the hydraulic reservoir.
– Remove the drain plug and allow the fluid to completely drain out to prevent spills during valve body removal.
– **Removing the Valve Body**
– Locate the valve body, typically situated near the hydraulic pump.
– Disconnect any hydraulic lines connected to the valve body using the appropriate wrenches. Use a cloth to catch any residual fluid.
– Remove any electrical connectors attached to the valve body, taking care to note their positions for reinstallation.
– Using the socket set, remove the bolts securing the valve body in place. Be sure to keep track of bolt sizes and locations.
– Carefully lift the valve body out of its housing. Use a pry bar if it is stuck, but avoid using excessive force to prevent damage.
– **Inspecting Components**
– Examine the old valve body for signs of wear or damage. Look for cracks, excessive wear, or broken components.
– Check the hydraulic lines for leaks or blockages and replace them if necessary.
– **Installing the New Valve Body**
– Clean the mounting surfaces to ensure a good seal.
– Position the new valve body in place, aligning it with the bolt holes.
– Reinstall the bolts and tighten them using a torque wrench to the specifications found in the shop manual.
– Reconnect any electrical connectors and hydraulic lines, ensuring they are secure and free from leaks.
– **Refilling Hydraulic Fluid**
– Replace the drain plug after ensuring that all lines are reattached and secure.
– Refill the hydraulic reservoir with the appropriate hydraulic fluid, following the manufacturer’s guidelines for fluid type and capacity.
– **Testing the System**
– Reconnect the battery.
– Start the Bobcat and allow it to run for a few minutes, checking for leaks around the valve body and connections.
– Operate the hydraulic functions to ensure everything is working smoothly. Listen for any unusual noises that might indicate a problem.
– **Final Inspection**
– After testing, perform a visual inspection to ensure all components are secure and there are no leaks.
– Dispose of old hydraulic fluid properly, following local regulations and guidelines.
Following these detailed steps will help ensure a successful valve body replacement on a Bobcat 428. Always refer to the specific service manual for additional details and safety precautions.
The idler pulley is a crucial component within the serpentine belt system of an internal combustion engine. Its primary function is to guide and tension the serpentine belt, which drives multiple accessories such as the alternator, power steering pump, water pump, and air conditioning compressor. By maintaining the correct tension on the belt, the idler pulley ensures that these components operate efficiently and reliably.
Typically made from durable materials like plastic or metal, the idler pulley features a smooth surface that allows the serpentine belt to glide over it with minimal friction. This design reduces wear on both the belt and the pulley itself, extending the lifespan of the serpentine belt system. The idler pulley is mounted on a bracket and is often equipped with a bearing that facilitates smooth rotation. Over time, the bearings can wear out or become damaged, leading to increased friction, noise, or even failure of the pulley.
A failing idler pulley can result in a loose or misaligned serpentine belt, which can cause a range of issues in the vehicle, including battery drain, overheating, and loss of steering assistance. Regular inspection and maintenance of the idler pulley, along with other belt components, are essential for preventing these issues and ensuring optimal engine performance.